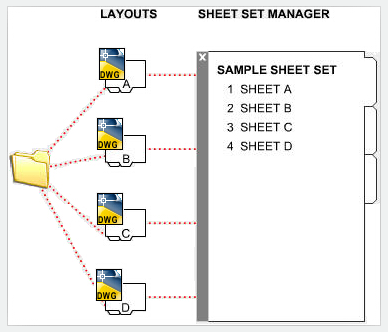
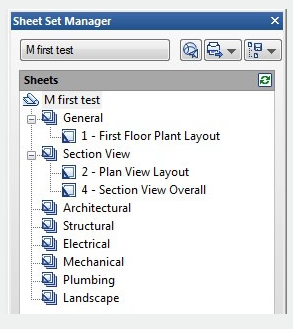
The SHEETSET command is used to managing large sets of drawings manually can be complicated and time consuming. In GstarCAD the Sheet Set Manager allows you to manage the entire project drawing sheet sets. It can manage all the work flow from sheets creation, printing and publishing .etc
Command Access :
Command : SHEETSET
Menu : View>Palettes>Sheet Set manager


In Sheet Set Manager, a sheet set is an organized collection of sheets from several drawing files and each sheet in a sheet set is a layout in a drawing file.
Begin taking advantage of sheet set functionality for your current projects with minimal effort by importing your current drawing layouts into a sheet set. You can easily open drawings from a central location while you continue edit them using traditional tools.
Create new sheets using traditional tools and then import those sheets into your current sheet set. Easily plot, publish, archive or create an electronic transmittal of the entire set of drawings. When you feel comfortable using the most basic sheet set functionality, you can begin assigning sheet set properties.
Using sheet set properties, you can easily plot to any named page setup, regardless of the page setup that is saved in each of the drawing layouts. You can also assign your drawing template file to the sheet set making it easy for you to create new sheets directly from the sheet set manager.
Moving on to the most powerful sheet set functionality, using Fields, enables you to automate the sheet data that is stored in your drawings. You can create your own fields in the form of custom sheet set properties and then reference those, and other fields, in your plot stamps and title blocks.
Sheet Set Manager Basic Information

Creating a Sheet Set
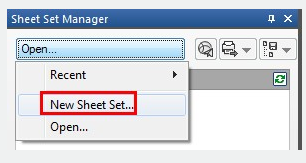
Once the Sheet Set Manager is open, select the pull down box at the top and then click on New Sheet Set. A new dialog box will pop up displaying the 4 steps in creating a Sheet Set.
Begin
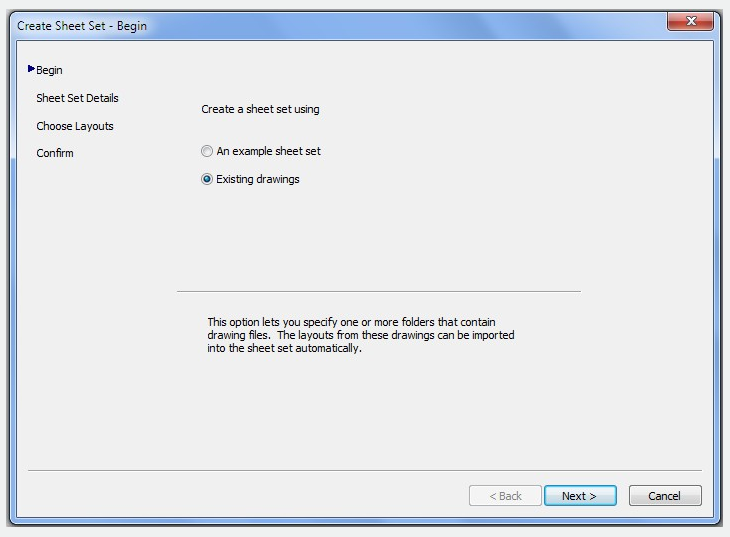
Under Begin there are two options for creating a sheet set.
Option one
Is using "An example sheet set" that allows the use of a standard template to create the sheet set.
Option two
Is using Existing drawings to start a new sheet set. We are going to select the Existing Drawings option.
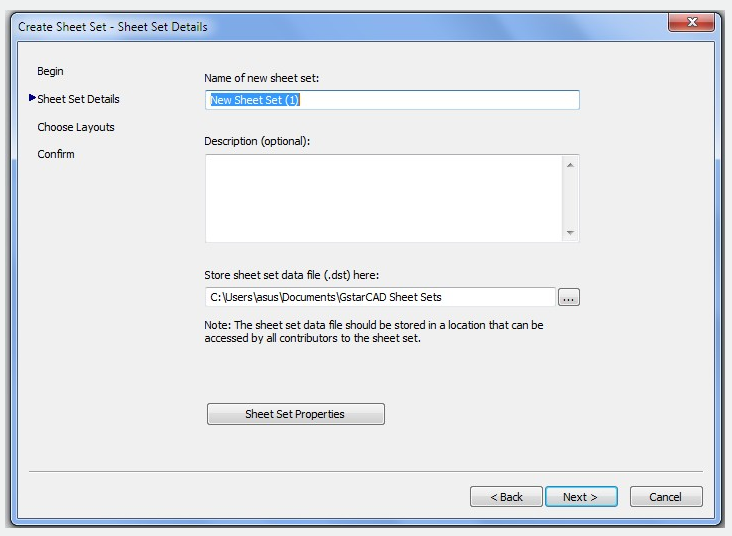
Sheet Set Details
This is where basic information like sheet set name, description, and file location can be added.
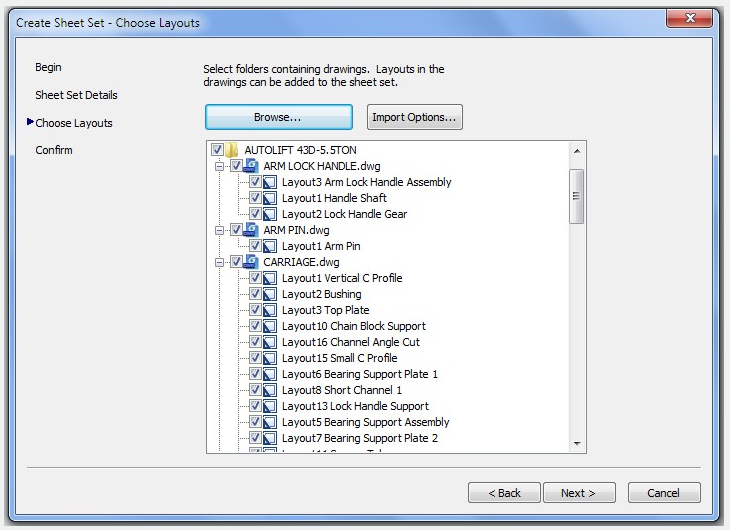
Choose Layouts
Existing layouts can be added to the sheet set by browsing for the proper file needed in the drawing set. Once the layouts are selected, click Next to confirm.
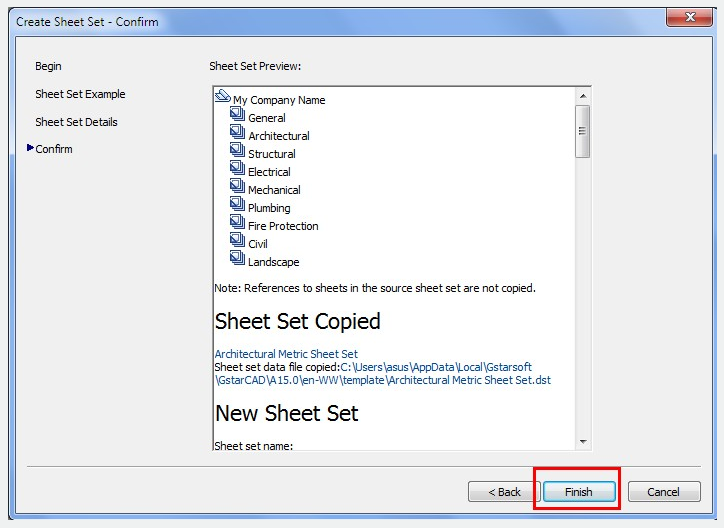
Confirm
The confirm tab will give a summary of the layouts to be added to the set. After selecting the Next button the new layout will be added to the sheet set.
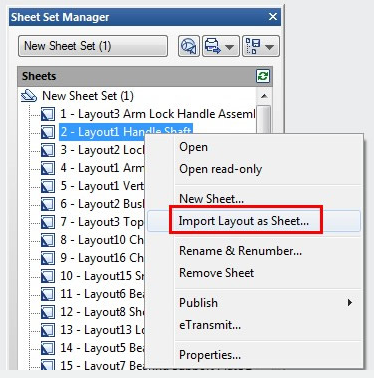
Import layouts to the Sheet Set Manager
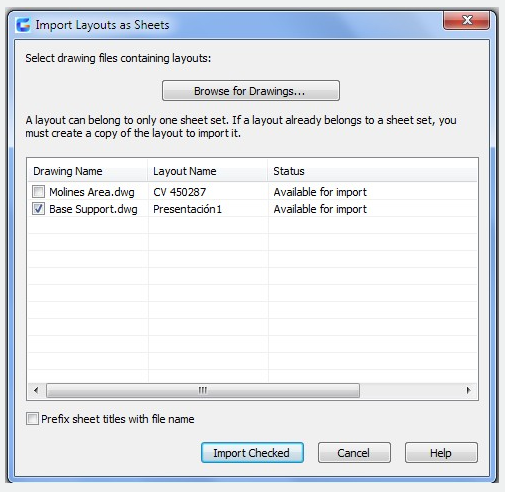
To add a new sheet from an existing drawing layout, right click the title of the sheet set and select Import Layout as Sheet. A new pop up box will appear which allows you to browse for an existing drawing to add a layout.
Managing Sheet Set
Moving and Removing Sheets from a set
Once the sheets have been added to the Sheet Set Manger, they can be dragged and dropped to the order needed. To remove a sheet from the set, right click and select Remove Sheet.
Rename and Renumbering Sheets
To rename and renumber a sheet or a subset, right click on the sheet needed to be changed and select Rename & Renumber.
Adding project information to a sheet set
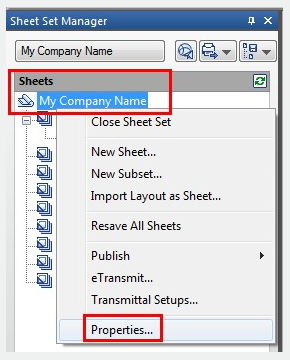
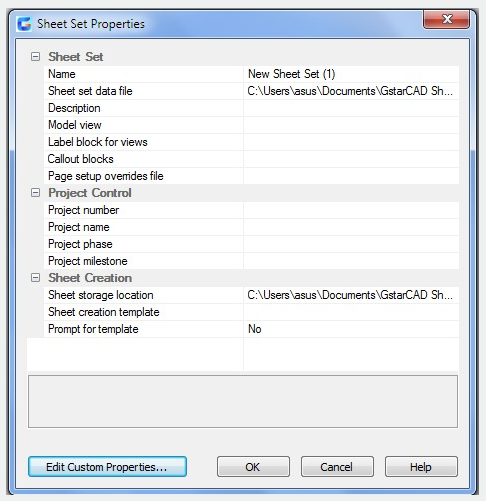
To add project information to the sheet set, like project name, project number, and project description, right click on the sheet set title and scroll down to the sheet set Properties.
A new pop up box will display that allows the update of project information. Tips: Project information in the sheet set can be used in object such as fields.
Publishing Sheet Sets
Sheet Set Manager makes it simple to publish a full set or only select sheets of the construction documents. There are two ways to plot: Publish directly to the plotter/file or use the Publish dialog box.
Publish and Plot directly to the plotter/file. Right click on the sheet set, scroll to Publish, and then Publish to Plotter.
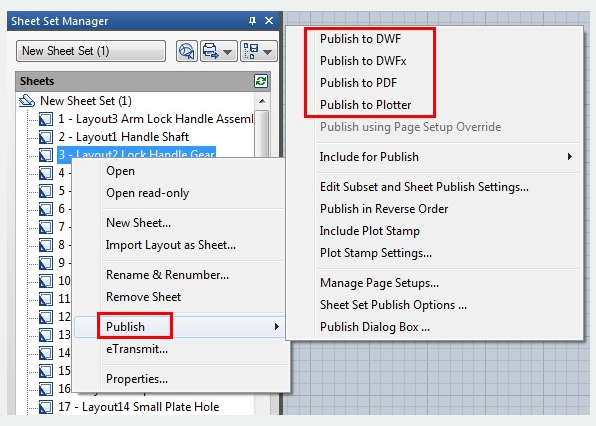
This method is used to plot and publish when the page setup is set per layout. The drawback to using this option is if someone plots one of the sheets using the plot command and saved the setup to the layout, the layout will not publish properly. Sheet set can also be packaged and shared through e-transmit.
Publishing using Publish dialog box may not be as fast as Publishing directly to the plotter/file, but there is less of a chance the document will come out wrong.
You are also able to use Page Setups saved in the drawing to particular sheets or the full set.
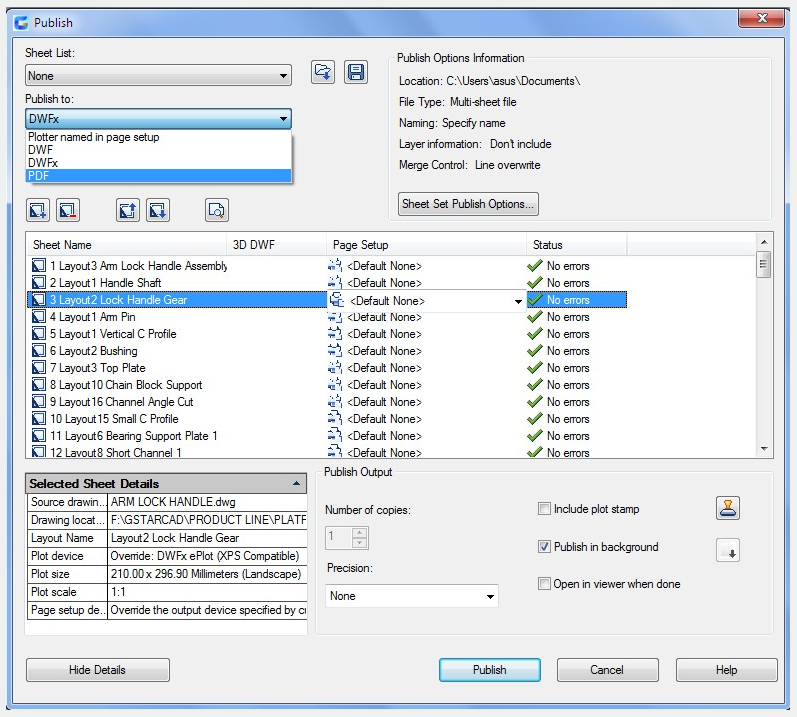
To pull up the dialog box, right click the Sheet Set title, scroll to Publish, and then to Publish Dialog Box. The Publish Dialog Box will display.
Now with page setups, Publish Dialog Box can change the way the document is published. Now we have the options to publish to Plotter named in Page Setup, DWF, DWFx, and PDF.
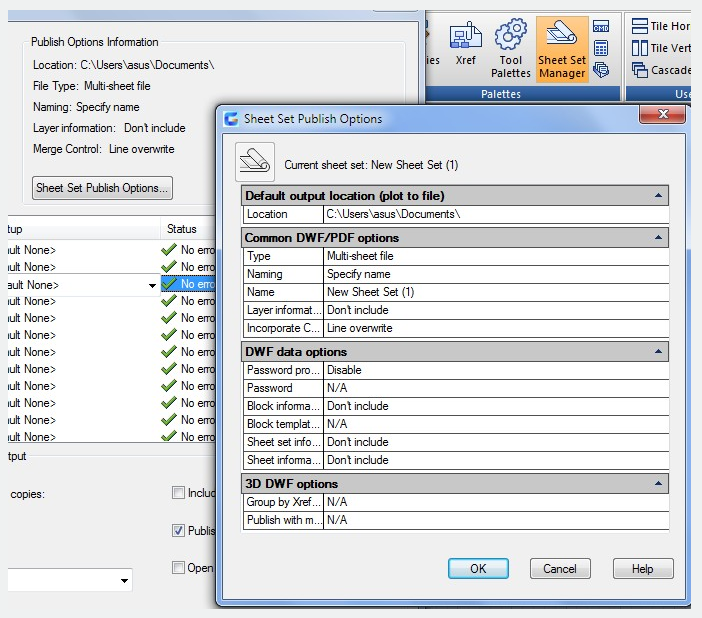
Selecting the Sheet Set Publish Options allows the options to change information like default output location and naming.
Article ID: 2463
Created: August 27, 2021
Last Updated: August 27, 2021
Author: GstarCAD MY /KW
Online URL: https://www.kb2.gstarcad.com.my/article.php?id=2463